December Decorations-Apartment Tree
I love Christmas! It is probably my favorite holiday! I love the music, the weather (yes, even in Texas I love Christmas weather), the food, everything! There just seems to be something different in the air. For my projects this month, I wanted to continue doing holiday decorations like I did for November. I'm going to do a different post for each project this time to make it easier to find or navigate.
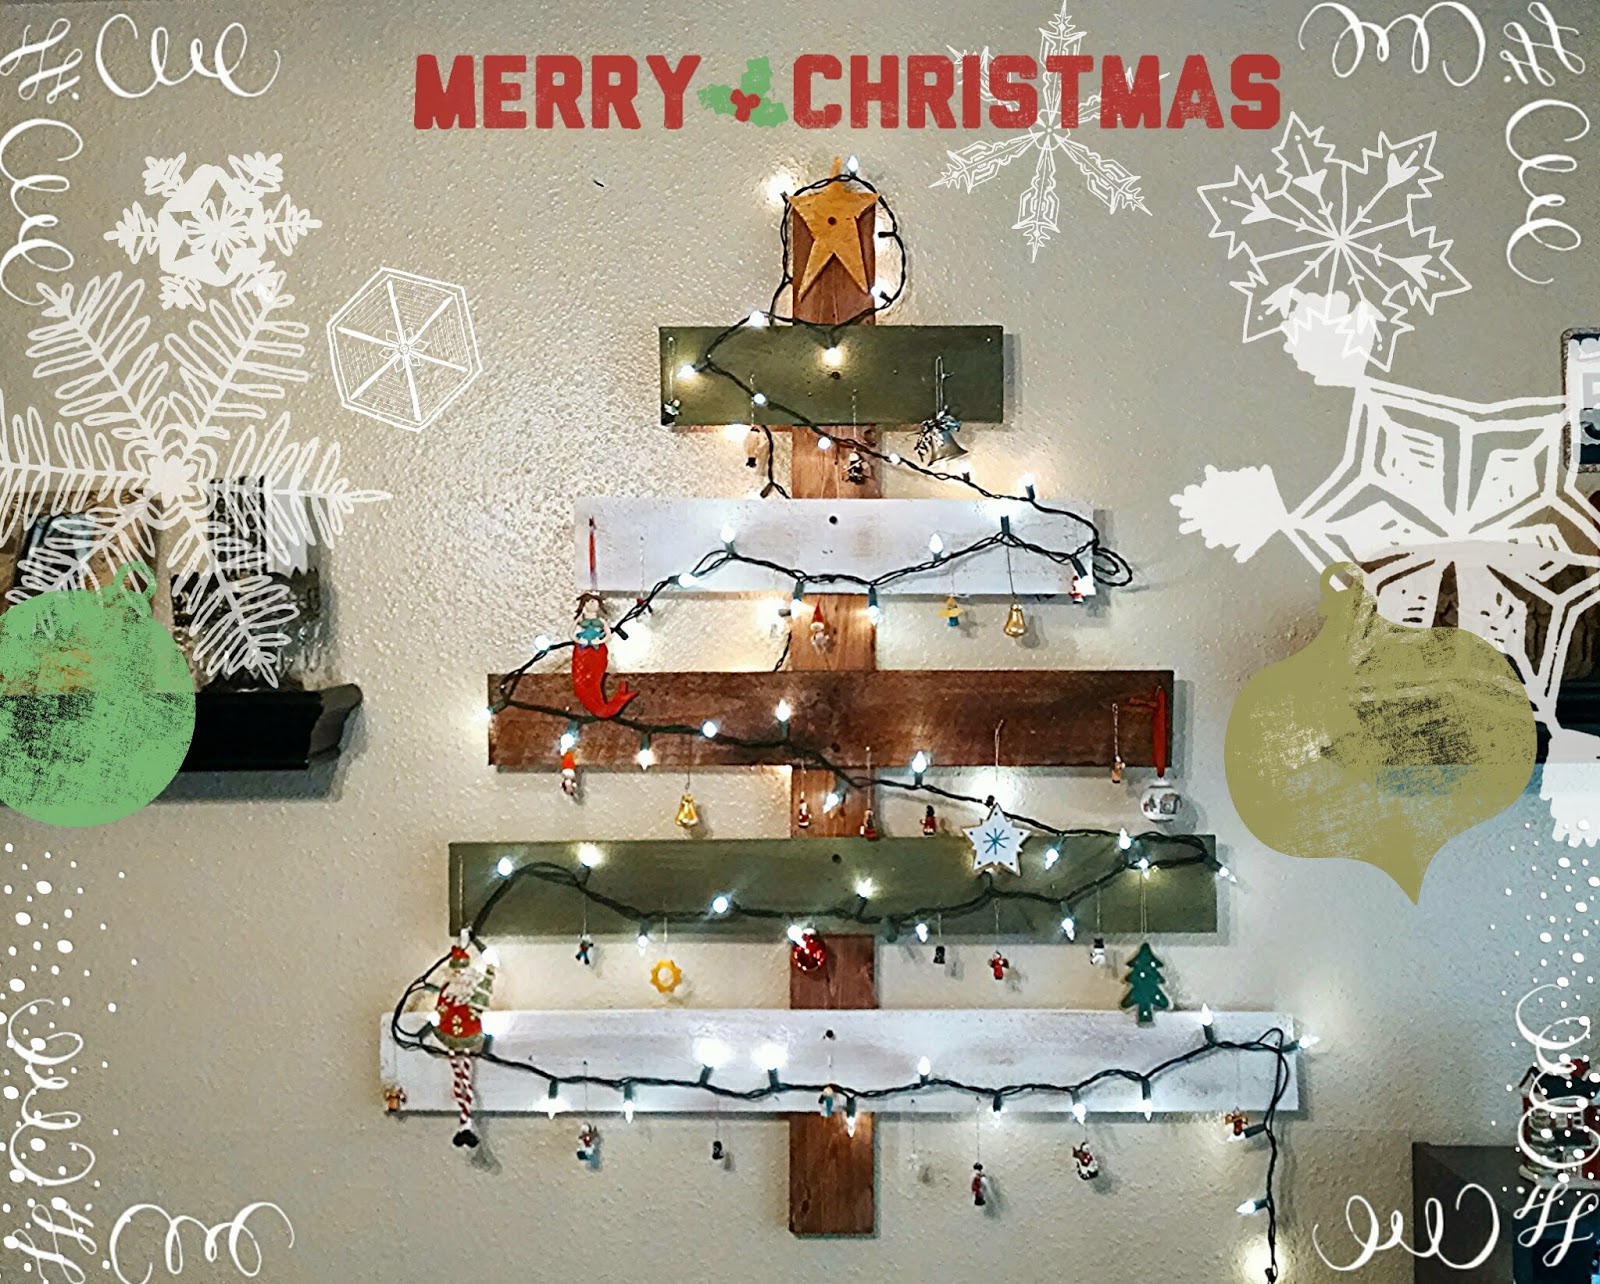
I started a Pinterest board called "Holiday in the Apartment" because it really is more difficult to decorate for an apartment space than it would be if I lived in a house. I wanted to find easy and cheap DIY projects for holiday decorating. A lot of these projects could easily be done for a home as well. One thing that caught my eye a lot was a tree made from pallet wood. There's tons of ideas out there but I liked this one the best:

In another post I mentioned that I work in an office that takes orders for products that we ship out of the warehouse in the back. I'm finding that there are a lot of scraps back there that they just throw away. I've got a guy back there that brings me these pieces of wood they use for spacers between pumps when we receive them from our vendor. He'll bring me a box of about 30 every so often. The woman that sits across from me in the office was showing me some pictures of a wall that her husband (who also works here but in the warehouse) made out of pallet wood. He just nailed the the pallet wood to an existing wall in their house, and they stained and painted it. I asked her where he got the wood from, and she said he got it from the warehouse! That's when I found out there is a whole stock of pallet wood at my backdoor!
But then I realized...I don't have any tools for cutting or sanding or anything! What was I going to do??? Then I had another realization...This husband obviously knew a thing or two about cutting wood, AND he obviously had the tools to do so but how could I ask him to cut the wood for me without offering him something in return? I'm sure he would have done it for free but they have kids and both of them work so I wanted to make it worth his while to help me. So I bartered chocolate chip cookies :) Homemade of course! My mom has an awesome recipe and I just discovered the joys of silicon baking mats so my cookies come out amazing! I told him he didn't even have to put it together. I would paint and assemble it. I just needed him to cut the wood. He agreed and a couple weeks later he brought the wood to work.
I liked how, in the inspiration picture, that each "branch" or level was a different color. So I did the same with mine. I had to paint all the pieces though because the guy used crate wood which isn't really the look I was going for. I already had paint from previous projects and some stain I bought for $1.00 at the clearance section at Lowe's. The white was pretty bright so I waited until it was mostly dry to add some stain to roughen it up and dull it a little.


That star is my favorite part because the guy who cut the wood, his son asked if he could help his dad cut the wood, and then the son drew and cut out the star! So precious :)
If you look closely at the inspiration piece, you'll notice that they put nails in each branch to hang the ornaments from but the nailed them in a curve pattern. I thought it was a great idea so I did the same. I would suggest using nails with bigger heads though because when I went to hang the ornaments and lights later on, it was a little harder getting them to stay. This part took the longest because the wood was about 1/2" thin so I didn't want to use nails any longer than that. But it also made them hard to hold and hammer in. I had to get a longer nail to make a starter hole for each smaller nail. Then I had to go back and nail each smaller nail in.


The guy had marked on the "trunk" or main stem where each piece was supposed to go, and since I stained it, it was easily visible. I screwed those pieces on as well as the star.


Honestly, I hate to try to hang things. I get lazy and just eyeball it but it's usually crooked our not centered. I got some help to hang it.


I absolutely love it! It's perfect for an apartment, and I'm sure I will keep it for a long time even if I move into a house one day.


Comments
Post a Comment